Page Editing
Navigate to Admin > Pages in the admin menu to view a list of all pages active on your website. You can add or remove pages from the predefined menu as well as edit the content featured on each page.
Custom Post Types
Your site may consist of various Custom Post Types which represent specific content being added to your site. These post types will appear in different pages throughout your site and may have their own custom fields, layouts and content.
Formatting Text
Your site will feature several content editors like the cone pictured below which allows you to enter written and visual content onto your page. Use these editors to format your text, create lists, hyperlinks and more.
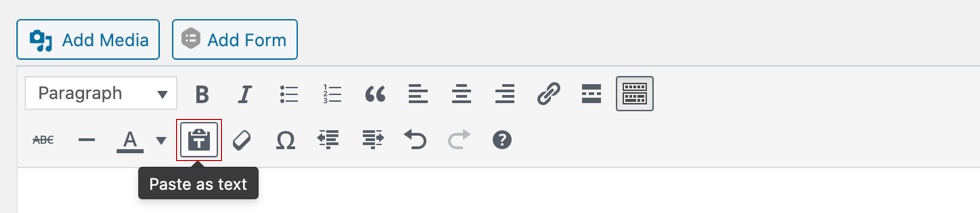
Note: Be careful when using copy and paste to transfer your content, often the formatting of the original text can be copied over as well. To avoid any text styles interfering with your website layout, use the 'Paste as plain text' button or switch to the 'Text' tab before pasting.
When styling text in the editor it is best to use the standard HTML tags. These tags have been styled by us to suit your site design. In the editor they will look un-styled. This is to aid in clear content management. View the updated page to see final result. To select the style, highlight the text first and use the drop-down style selector or one of the editor buttons. Basic formats include:
- Headings
- Paragraphs (normal text)
- Lists
- Quotes
When you're finished updating your page, click the PREVIEW CHANGES button to see your updates live in action. Once you're happy, click the UPDATE button to publish your changes to the website.
Adding a Link to Body Content
Highlight the word or images you wish to add a hyperlink to and click the button displayed below.

Alternatively, use the button Select Link and you will prompted to enter the URL (including prefix http//:) and link title. Click INSERT and test your link to make sure it works!
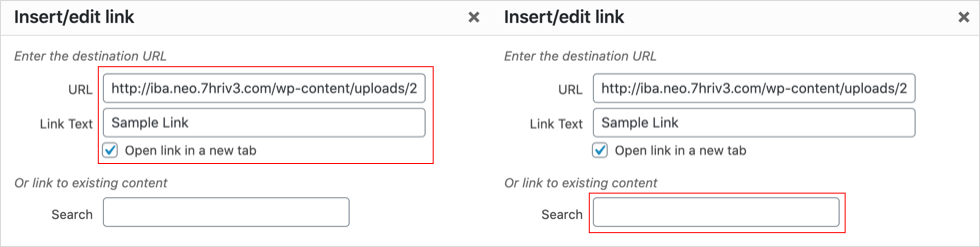
To insert an email link, you add mailto: followed by the
email address: mailto:info@thriveweb.com.au
Adding a Picture in Page Content
Make sure your picture is a reasonable file size, normally not more than 2MB. Click ADD MEDIA button, and a screen allowing you to upload your photo will appear. You can drag and drop files into this window.
You can also choose a file from your device and select it. Wait for all the files to upload and save on the web server. Once it uploads, select the size and alignment options at the bottom, and click INSERT INTO POST.

How to Crop, Rotate, Scale, and Flip Images
Then once your image is uploaded, you just need to click on the little button that says Edit Image.
Just select the area you want to crop. Or click on the rotate / flipping icon. You can click to scale. You can even crop based on ratio. Pretty handy little feature right? You will be taken to an screen that looks like this: